Did you know you can add multiple files at once to HR Knowledgebase?
Scenario
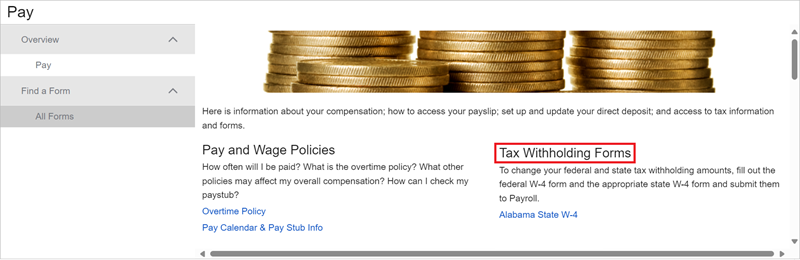
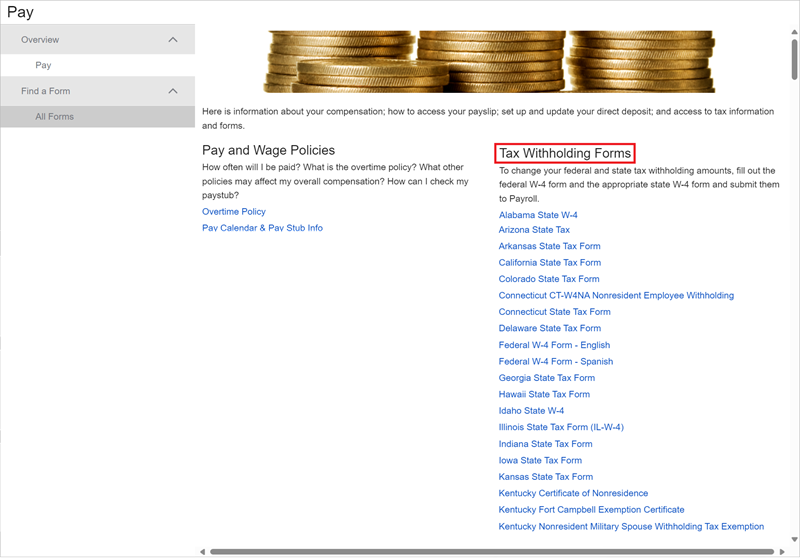
HR needs to add 20 uploaded files to the Pay landing page under the Tax Withholding Forms header.
Instead of adding all 20 files one by one, HR saves precious time via the Bulk Upload function in the Knowledgebase Content Manager (KCM)—formerly known as the Client Content Toolset (CCT).
Who Can Use the KCM?
There are two types of access (user roles) in the KCM: Producer and Reviewer.
- Producers can create and modify uploads via the KCM.
- Reviewers can view, create, and add metatags to uploads via the KCM but cannot add groups to them.
Preparing to Upload
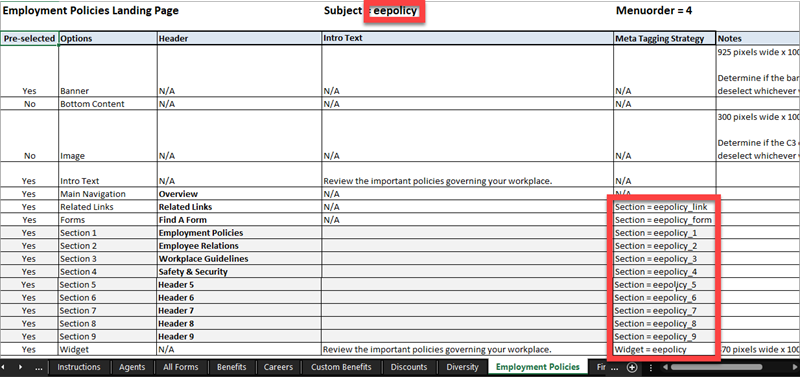
The Landing Page Planner (LPP) for the KB site provides Article (Subject) and other meta tag information for uploads (and other documents).
The LPP is the multi-tabbed Excel Spreadsheet which was provided to your organization previously. It defines all of the main (landing) pages on your KB site.
Each landing page tab in the LPP includes:
- Subject meta tag: corresponds with the main page’s Article in the KCM
- Section meta tags: for placing links to documents under the desired header on a main page
- Widget meta tags: for placing links to documents on a widget on the Home page
Customers define their own Keyword meta tags for each document as preferred (optional).
Keep a copy of the LPP spreadsheet handy. Contact your HRSD CSM for a copy as needed.
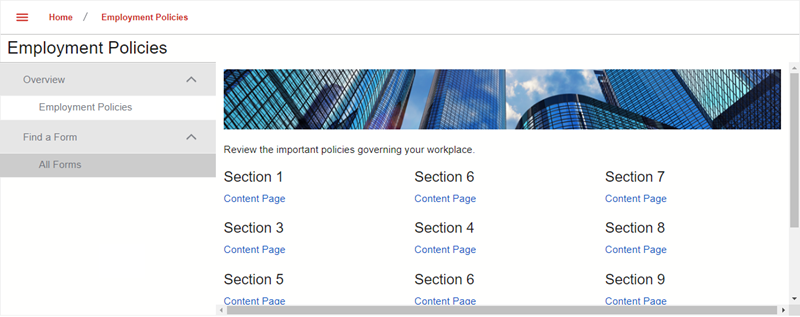
About Section Meta Tags
Section meta tags correspond with the section headers on a main page, including the Related Links and Find a Form headers in the left-hand sidebar.
Notes:
A main page's Subject meta tag is the same as its Article meta tag.
If a main page’s Subject = eepolicy, the Section and Widget meta tags also use eepolicy for meta tagging a document to cause its link to appear in the chosen locations on the main page and on its widget.
For example:
- Subject = eepolicy
- Section = eepolicy_1
- Widget = eepolicy
File Types for Uploads
File types that can be uploaded include:
- Adobe Acrobat portable document format: .pdf (best strategy)
- Adobe Flash: .swf
- Bit map: .bmp
- Comma-Separated Values file: .csv
- Extensible Markup Language: .xml
- Graphic Interchange Format: .gif
- Hypertext Markup Language: .htm, html
- Joint Photographic Experts Group: .jpeg, .jpg
- Macromedia Flash: .fla
- Microsoft Excel: .xls, .xlsx
- Microsoft PowerPoint: .ppt, pptx
- Microsoft PowerPoint Show: .pps
- Microsoft Word: .doc, .docx
- Open Document Format text file: .odt
- Open Document Presentation Document Format: .odp
- Open Document Spreadsheet: .ods
- Open Office Document: .odt
- Open Office Graphic: odg
- Open XML Paper Specification: .xps
- Portable Network Graphic: .png
- Rich Text Format: .rtf
- Text files (Notepad): .txt
The maximum recommended file size for uploads is 28 MB (megabytes).
Notes:
- Uploads based on .pdf and .txt files open immediately. However, when users click on links to uploads that are created with the other file types listed above, a window appears which contains the upload’s file. Users must click on the file to open it. Therefore, consider converting Microsoft and other files to .pdf format and use it to create the upload (if the file is not a form that employees must fill out and complete).
- Do not upload active files, such as spread sheets that use embedded macros or other dynamic components. Because active documents can trigger a security feature that prevents them from being uploaded or accessed from the portal, they are not allowed. To make active documents available to HR Knowledgebase site users, the best practice is to host those documents on your organization's servers and link to them from HR Knowledgebase.
Bulk Uploading: Steps
Preparation
Files uploaded in bulk must include the same groups.
Files uploaded in bulk must include the same meta tagging (Article/Subject, Section, keywords, etc.). Thus, they will appear in the same location on a landing page or on a widget.
For example, on a landing page, locations for uploads include:
- Any of the nine headers in the main area
- The All Forms header in the left-hand sidebar
Note:
File names cannot contain any of the following characters: ` ~ ! @ # $ % ^ * + = { } [ ] | " : < > ;
Procedure
1. Log into HR Knowledgebase in stage.
2. The Home page appears. In the upper right, under your user name, click the three dots icon. The KCM’s drop-down menu appears. Click Document Manager.

The KCM appears. It is labeled “Document Manager.”
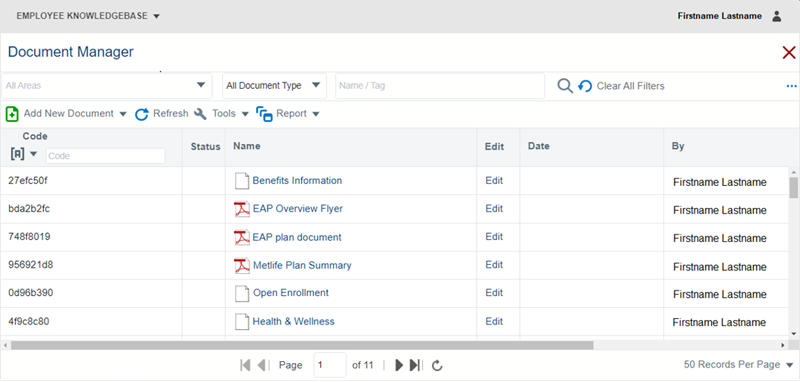
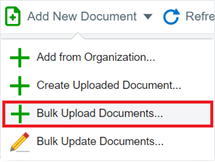
3. On the Document Manager page, near the upper left, click the Add New Document drop-down list, then select Bulk Upload Documents.
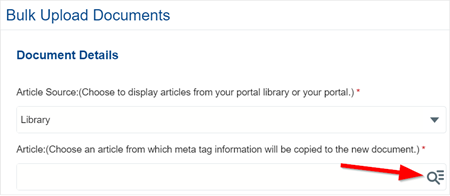
4. The Bulk Upload Documents page appears.
- Leave the Article Source "Library" selection as-is.
- In the Article field, click the Search icon (magnifying glass).
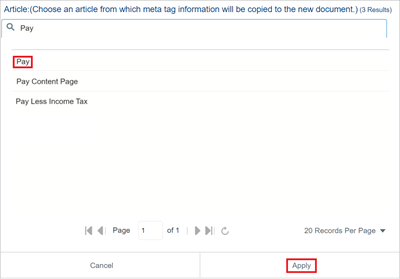
In the Article pop-up, locate and select the desired article via the search field or the list of Articles, then click Apply.
Use the Landing Page Planner to locate the correct Article (Subject) for the landing page to which the uploads will be added.
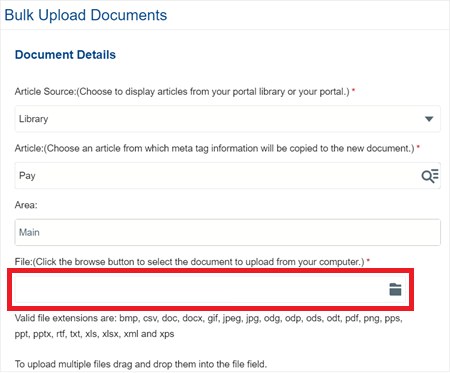
After selecting the Article, the Area field self-populates.
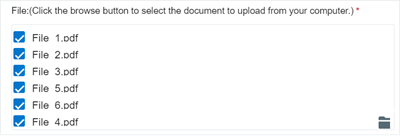
5. For the File field, either:
- Click the Browse button (file folder icon) and select each file to be uploaded in bulk; or
- Drag and drop the files into the File field.
6. On the Meta Tags tab:
- Click the red X next to Menu to delete this meta tag.
- Click the red X next to Order to delete this meta tag.
- Click the red X next to Widget to delete this meta tag if the uploads are not to appear on a widget.
Note:
The Subject meta tag automatically appears based on the Article previously selected.
If the uploads are to appear on a landing page:
• In the Key drop-down list, select Section.
• In the Value field, enter the Section meta tag for the location on the landing page or widget where the uploaded files are to appear.
• Use the Landing Page Planner to locate the correct meta tag, e.g., Section = pay_2.
• Click Add.

If the uploads are to appear on a widget:
• Click on the Widget meta tag.
• In the empty field on the right, enter the meta tag.
• Click Update.

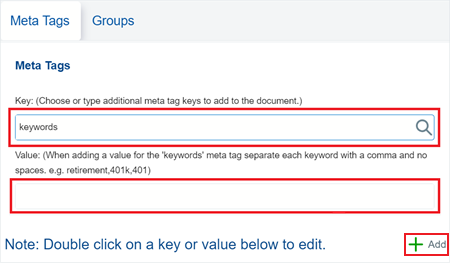
Optional:
• In the Key drop-down list, select keywords.
• In the Value field, enter the appropriate keywords for the uploaded files.
• Click Add.
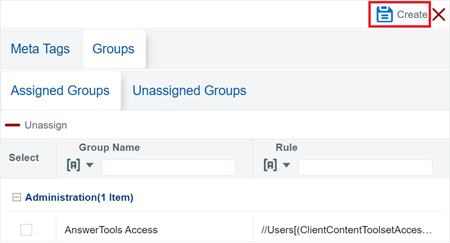
7. On the Groups tab:
Click the Unassigned Group tab. Select groups by ticking their checkboxes, then click Assign.
Note:
Be sure to select the AnswerTools Access group to ensure the uploads will be accessible in Knowledgebase Content Management (KCM).

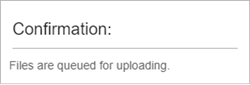
• Click the Assigned Groups tab to verify the selected groups, then click Create.
A confirmation message appears.
8. When the bulk upload process completes, the Knowledgebase Content Management (KCM) system sends a notification via email.
Check the email to ensure all the documents were uploaded successfully.

Note:
File upload failure can occur when:
- The file names contain a disallowed character
- A file with the same file name has already been created
- The file name exceeds 100 characters
- The file type isn't allowed
- The file size exceeds 28 MB.
9. Close the Bulk Upload Documents page.
10. On the Document Manager page, locate each bulk uploaded document. For each:
- Click Edit.
- To edit its name, in the Tools menu, click Details, edit the Name field's text and click Update.
- Check in the upload document.
- Publish the upload to the appropriate environment(s).
- Log out of HR Knowledgebase, then log back in.
- Verify that the bulk uploaded documents appear in their intended location on their assigned landing page or widget.
For questions or more information, contact your HRSD Advisor (Customer Success Manager (CSM)).
Please Send Your Feedback!
We encourage you to comment on this post—and any of the other posts on the HRSD Community that apply to you.
Your feedback helps us to improve our products and add enhancements to make them as useful to you and your employees as possible.
Thank you in advance!
