Did you know you can fast-track critical cases to top experts in HR Case Management?
Critical cases require immediate action:
• Compliance
• Emergencies
• Harassment
• Safety
• Security
• Workplace violence
Documenting sensitive situations is key for mitigating legal exposure. Critical cases provide a secure record of actions taken.
Rules & HR Case Management
For run-of-the-mill concerns, HR Case Management's routing manager rules use up to three criteria to send cases to the right service group's Tier 1 agents: the topic, category, and subcategory.
For critical issues, triage rules can use criteria in additional areas of the case form to route cases, e.g., population, subject term(s), issue term(s), etc.
Triage rules bypass routing manager rules to send critical cases to service groups’ higher tier agents for expedited service.
Customers can create triage rules via the Process Builder in the Active Cases report or the Process Builder/Triage Rule menu. They can enable and disable triage rules as per business need.
Benefits
• Triaging supersedes the routing manager’s standard rules.
• Triage routing includes case areas beyond the topic, category, and subcategory. Critical cases land where they should.
• Triage rules can route critical cases to Tier 2 or Tier 3 service groups. Tier 1 service groups never receive them which precludes escalation.
• Expedited cases mean employees receive solutions faster.
Creating the Triage Rule User Account: Steps
When enabling the triage rule feature, customers must create the triage rule user account in Knowledgebase Admin.
This account is for users who do not work on cases and for auditing purposes.
Because the triage rule is an automation task, the system needs a "dummy" user to log who triaged the case and processed the task.
1. Log into the portal as an HR Knowledgebase administrator.
2. In the portal menu, navigate to Knowledgebase Admin > Users.
3. On the Users page, click Add New.
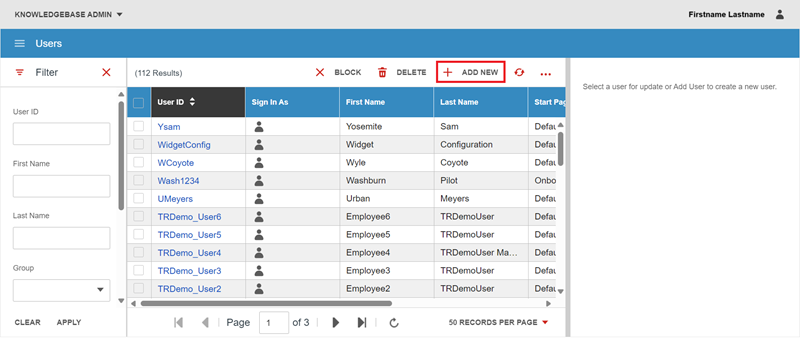
4. The user account details panel appears on the right.
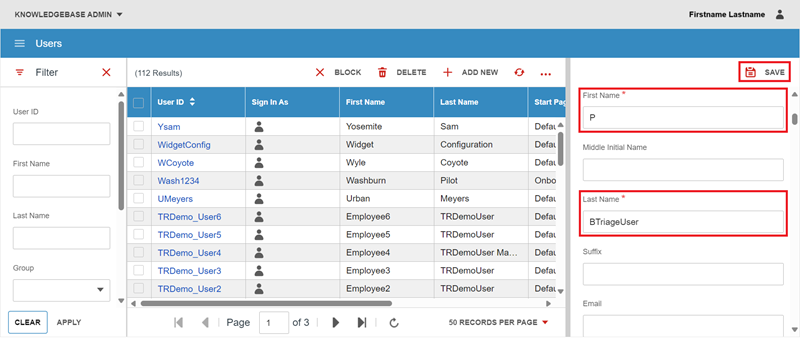
For the Triage Rule user account, enter text in the First Name and Last Name fields.
Enter a name that indicates the user account's purpose.
For example, PBTriageUser for "Process Builder Triage User."
In the First Name field, enter P; in the Last Name field enter BTriageUser.
Then click Save.
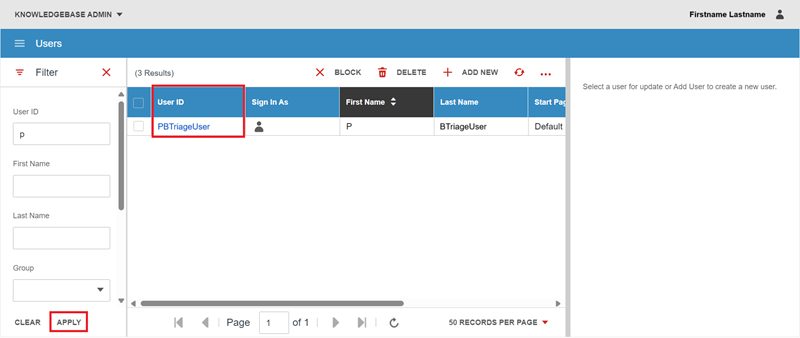
5. Make note of the user IDs that the system creates for the triage rule user account.
Enabling the Process Builder for Triage Rules: Steps
1. Log into the portal as a setup administrator (CMsetup).
2. Navigate to Case Management Admin > Application Settings.
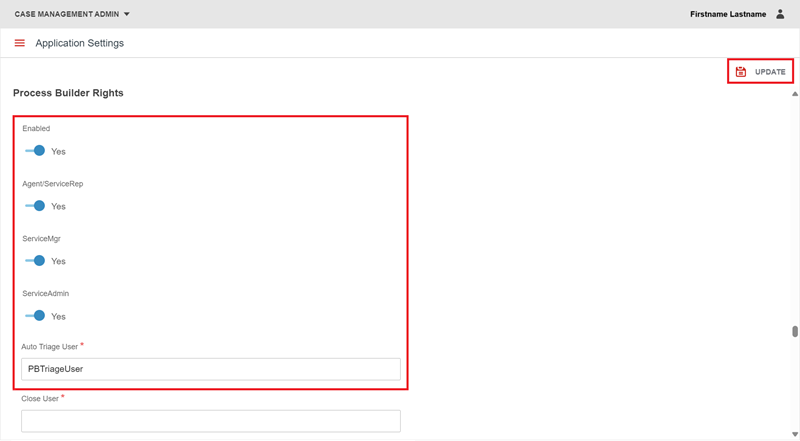
3. On the Applications Settings page, scroll down to the Process Builder Rights area.
• Click the Enabled switch to set it to “Yes.”
• Grant Process Builder rights to service user roles by clicking the ServiceRep, ServiceMgr, and/or ServiceAdmin switches to set them to “Yes.”
• In the Auto Triage User field, enter the Triage Rule user ID that was created in Knowledgebase Admin > Users.
For example: PBTriageUser. The text field will display a drop-down list of users based on the characters entered.
• Click Update.
Once enabled, the Process Builder will be available in:
• Case Management Analytics > Case Reports > Active Cases; or
• Case Management Admin > Process Builder menu.
The same options appear in both areas.
Creating Triage Rules via the Active Cases Report: Steps
1. Log into HR Case Management.
2. Navigate to Case Management Analytics > Case Reports > Active Cases.
3. On the Active Cases page, in the Filter Options column, enter one or more criteria. Then click Apply.
4. In the search results:
• Locate any case that contains one or more criteria needed to create the desired triage rule.
• Tick the case’s check box to select it.
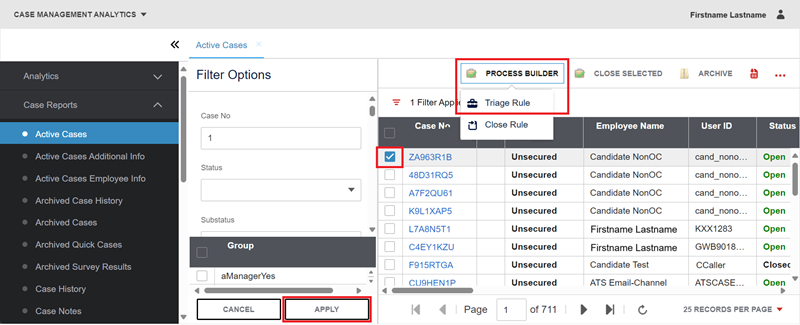
5. To create a triage rule:
• From the Process Builder drop-down menu, click Triage Rule.
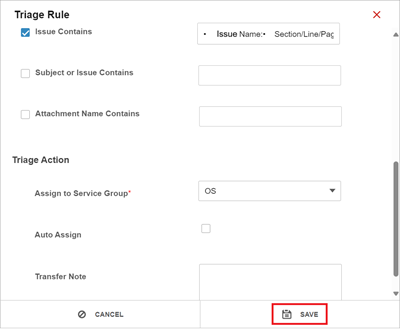
• In the Triage Rule pop-up, select the criteria to define the triage rule by ticking their check boxes and configuring their fields.
• Click Save.
Note:
The following criteria from the selected case appear by default:
• Topic
• Population
• Subject Contains
• Issue Contains
Only the selected fields will be applied to the new triage rule.
If a submitted case’s criteria match all of the triage rule’s criteria, the system routes the case as per the triage rule’s settings.
If a submitted case’s criteria do not match all of the triage rule’s criteria, the system routes the case as per the routing manager’s settings.
Creating Triage Rules via Case Management Admin: Steps
1. Log into HR Case Management.
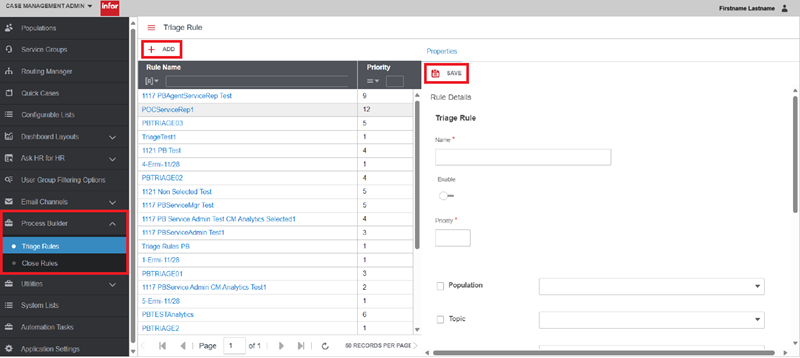
2. In the portal menu, navigate to Case Management Admin > Process Builder.
3. To create a triage rule:
• From the Process Builder drop-down, click Triage Rules.
• The Triage Rules page appears. Click Add.
• The new rule’s Properties panel appears on the right.
• Configure the rule’s criteria.
• Click Save.
For questions or more information, contact your HRSD Advisor (Customer Success Manager (CSM)).
Please Send Your Feedback!
We encourage you to comment on this post—and any of the other posts on the HRSD Community that apply to you.
Your feedback helps us to improve our products and add enhancements to make them as useful to you and your employees as possible.
Thank you in advance!
