Course Event Import Utility
There are times where you may need to create new classroom courses with multiple events. One way of creating those courses and events is to utilize Course-Add followed by Event – Add, however, if there are dozens or hundreds of new courses and events this can be quite time consuming!
Within the LMS, we have a utility called Course Event Import Utility which allows you to create, modify, and schedule courses and events. In this Guide we will go through the steps on how to add Courses and Events into the LMS utilizing this utility as well as discussing some limitations with the Course Event Import Utility.
Limitations:
- The Course Event Import utility cannot Modify event sessions already present in an event. It can add additional sessions only.
- Modifications of Events will require finding the Event ID. Utilizing the Logs from the Course Event Import utility can provide you with Event IDs if they were created by the utility. Alternatively, you can utilize Ad-hoc Reports to find the Event ID or go to Courses -> Event View.
- Creation of courses for future CCCE courses, cannot be done via this utility.
Where is the Course Event Import Utility?
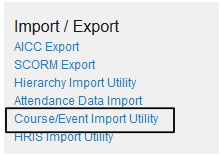
The Course Event Import utility is found in the Admin Role -> System -> Import/Export -> Course/Event Import Utility.
How to download the Course/Event Template and Understanding the data columns
- To download the Template go to the Course/Event Import Utility in admin. System -> Import/Export -> Course/Event Import Utility.

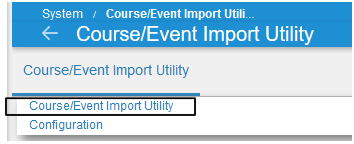
- Select the Course Event Import Utility, and then select Course Event Import Utility
- Select Download CourseEvent Import Template
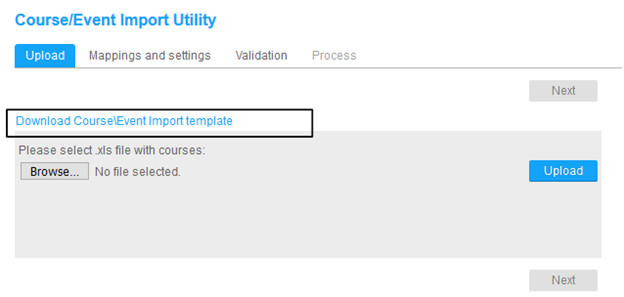
- Open the downloaded Template to begin the process
Lets take a look at that Template!
Inside of the Excel (.xls) file, there are numerous columns which reference different sections of the Course or the Event. With each column, you can find additional information pertaining to the Column such as the Format Required, if the Item is required, etc, by simply hovering over the Column
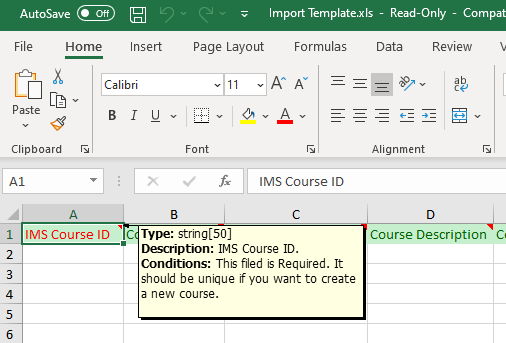
Columns A through J are Course specific items. These Include the IMS Course ID, Course Name, Short name, Description, Etc.
Columns K through AM are Event Specific Items. This is where you would place event information such as Event Name, Instructor Names, Min and Max Enrollment, Enabling Online, ILMS, or classroom portions, and more.
Columns AN to AV contain additional Course and Event options. These options include Course/Event Default, Level placement, Registration Options, and more.
Course Columns A – J


|
Column Name
|
Description
|
|
IMS Course ID
|
This is the Unique ID of the course that can be configured. If there is a course with the same Unique Course ID, the utility will update the course already present. To determine which field in the LMS is the Unique Course ID, please speak with you CSM as this can be sometimes modified to a different string value.
This field is required*.
|
|
Course Name
|
The name of the course is placed in this column. This utility will not find existing courses based on the Name, but the IMS course ID.
This field is required
|
|
Course Short Name
|
This field is for the Short name field of the course.
This is not a requirement and can be added later in admin.
|
|
Course Description
|
A description of the course can be added in this column. If there is HTML in the Description text you can add it here if you would like a specific format.
This is not a requirement and can be added later in admin.
|
|
Course Objective
|
Objectives for the course can be added in this column. Similar to Course Description, HTML text coding can be added into this column if you would like a specific format.
This is not a requirement and can be added later in admin.
|
|
Audience
|
The Target Audience or Description of who will be assigned to this course can be added here.
This is not a requirement and can be added later in admin.
|
|
Course Credit
|
Assignment of Credits can be added into this column.
This is not a requirement and can be added later in admin.
|
|
Active
|
A value of 0 would mean that the course is Inactive
A Value of 1 would mean the course is active.
This is not a requirement and can be adjusted later. If no value is placed, the course will be Inactive
|
|
Duration
|
This is not a requirement and can be added later in admin.
|
|
Duration Units
|
This is not a requirement and can be added later in admin.
|
Event Columns K through AM


|
Event ID
|
For new events, this is to be left blank.
For existing events that you wish to update/add additional sessions to, you will need to place an Event ID
|
|
Event Name
|
Place the name of the Event Name per your organization’s naming convention – 60 Character limit. This is a required field for new events
|
|
Event Template Name
|
If there is an event template that you would like to utilize, place the name of the Event template in this column.
This column is not required
|
|
Is ILM Portion
|
If the course you are updating is a CCCE Course that is Already present and would like the event to have that option enabled, place a ‘1’ in this column. If left blank, it will be unchecked.
Please note – It is not suggested to utilize the CourseEvent Import Utility to add Content Creator CE courses to the LMS.
This is not a required field
|
|
ILM Start Date
|
If you would like to specify what dates users can launch the CCCE Course, place the start date for the Event in a m/d/yyyy format or mm/dd/yyyy format.
This is not a required field
|
|
ILM End Date
|
If you would like to specify what dates users can launch the CCCE Course, place the end date for the Event in a m/d/yyyy format or mm/dd/yyyy format
This is not a required field Unless there is an ILM Start date
|
|
Is Online Portion
|
If the course you are updating is an SCORM/AICC Course that is already present or will be imported later on, and would like the event to have that option enabled, place a ‘1’ in this column. If left blank, it will be unchecked.
This is not a required field
|
|
Online Start Date
|
If you would like to specify what dates users can launch the SCORM/AICC Course, place the start date for the Event in a m/d/yyyy format or mm/dd/yyyy format.
This is not a required field
|
|
Online End Date
|
If you would like to specify what dates users can launch the SCORM/AICC Course, place the start date for the Event in a m/d/yyyy format or mm/dd/yyyy format.
This is not a required field Unless there is an Online Start Date
|
|
Is Classroom Portion
|
If the course and/or event that you are adding to the LMS is going to be a Classroom Portion course, Place a ‘1’ in the column. If left blank, the Event will not have the Classroom Portion checked.
|
|
Classroom Session Start
|
Classroom Session Start and End is one of two ways to add sessions to an event. This Column is useful for Events whose sessions are reoccurring and have the same time and days. Example: For 2 weeks, users will attend a Session Monday, Wednesday, and Friday from 2 PM to 4 PM.
This should not be utilized for Events that contain 1 session. – Many customers prefer the column “List of Single Sessions” due to ease of use
The Format for the Date will be m/d/yyyy hh:mmtt 1/1/2021 09:00AM
The time inserted here will be for the Start Time for the Session for each day. End time will be configured in the Classroom Session End.
Alternatively, utilize the Column “List of Single Sessions” to add classroom sessions
|
|
Classroom Session End
|
Classroom Session Start and End is one of two ways to add sessions to an event. This Column is useful for Events whose sessions are reoccurring and have the same time and days. Example: For 2 weeks, users will attend a Session Monday, Wednesday, and Friday from 2 PM to 4 PM.
This should not be utilized for Events that contain 1 session.
The Format for the Date will be m/d/yyyy hh:mmtt 1/1/2021 02:00PM
The time inserted here will be for the End Time for the Session for each day.
Alternatively, utilize the Column “List of Single Sessions” to add classroom sessions
|
|
Select Timezone
|
This is the column that a timezone for a classroom session can be selected. Use the Dropdown to choose the appropriate Timezone.
|
|
Timezone
|
This column will be filled if the “select Timezone” is select.
|
|
Days of week
|
If Utilizing Classroom Session Start and Classroom Session End Columns, you can chose the days of the week for the event that sessions will be created for. Monday = ‘1’, Tuesday = ‘2’, etc.
For a Classroom session that will occur on Monday, Wednesday, and Friday, the column should contain ‘135’
|
|
List of Single Sessions
|
This is usually the preferred method of adding Classroom Sessions to an Event.
Utilizing this column, you can specify the date and Start time for a given session utilizing the format m/d/yyyy HH:MMtt . Example March 9th 2021 for a session that starts at 1:00 PM would be 3/9/2021 01:00PM.
If you would like to add an additional session, you can separate the dates and times using |
Example:
3/9/2021 09:00AM|3/10/2021 12:00PM
The end time of the session will be based on the next column “Duration of Single Sessions”
|
|
Duration of Single Sessions
|
Duration of Single session allows you to specify the duration of the Session. This is based off of minutes. Adding ‘120’ in this column for the session 3/9/2021 09:00AM would create a session that Starts at 9:00AM which ends at 11:00 AM or 2 hours.
|
|
Instructors
|
Adding the Instructor ID to this column will assign an instructor to the Classroom Session(s).
|
|
Adhoc Instructor
|
This column allows you to type a name of an instructor that may or may not be in the LMS. Utilizing this column will remove the potential benefits in the Standard Instructor column such as Schedule Conflicts, Calendar appearance, etc.
|
|
Facility Room ID
|
Adding the Room ID in this column will assign the facility room to the Event Session(s)
|
|
AdHoc Facility Room
|
This column allows you to type a name of an Room that may or may not be in the LMS. Utilizing this column will remove the potential benefits in the Standard Facility Room column such as Schedule Conflicts, Calendar appearance, etc.
|
|
Min Enrollment
|
Allow you to specify the number of users for Minimum Enrollment
|
|
Max Enrollment
|
Allows you to specify the maximum number of users who can register to the course event(excluding waitlist)
|
|
Max Waitlist Users
|
Allows you to specify the maximum number of users that can be placed into a waitlist for the event.
|
|
Registration Start Date
|
Leaving this Column blank will allow a user to register for the event at anytime.
To specify a date for users to register into the event, the Registration Start Date and Registration End date would need to be configured.
The format for this column is m/d/yyyy
|
|
Registration End Date
|
Leaving this Column blank will allow a user to register for the event at anytime.
To specify a date for users to register into the event, the Registration Start Date and Registration End date would need to be configured.
The format for this column is m/d/yyyy
|
|
Cancellation End date
|
Leaving this Column blank will allow a user to cancel from the event at anytime.
To specify a final date for users to be able to self-cancel from an event, the Cancellation End Date would need to be configured.
The format for this column is m/d/yyyy
|
|
Evaluation Start date
|
Leaving this Column blank will allow a user to launch the Evaluation/Survey for the event at anytime.
To specify a date for users to be able to Launch a Course Evaluation for a course event, the Evaluation Start Date and Evaluation End date would need to be configured.
The format for this column is m/d/yyyy
|
|
Evaluation End Date
|
Leaving this Column blank will allow a user to launch the Evaluation/Survey for the event at anytime.
To specify a date for users to be able to Launch a Course Evaluation for a course event, the Evaluation Start Date and Evaluation End date would need to be configured.
The format for this column is m/d/yyyy
|
Additional Course And Event Fields


|
IMS Level IDs
|
Depending on what level you currently have selected in the Hierarchy Tree when utilizing the Course Event Import Utility, you may or may not need to have this field filled in. If the System Level is selected, the IMS Unique Level ID will need to be placed into this column so that the Course and/or event can be placed on the Level 2 or Lower. If you have a Level 2 or Lower selected, the utility does not require this column as it will add the course/event to the current level selected.
|
|
Make Course Default
|
If you would like to make the Course Default(Assign course to ALL users on the Level) you can add the information in this column
Blank or ‘0’ will not Default the Course
‘1’ will default the course. This option will assign the Course to ALL Users. Use caution
|
|
Make Event Default
|
If you would like to automatically assign ILM/Online Event to users who are assigned to the course, you can make the Event Default.
Blank or ‘0’ will not Default the Event
‘1’ will default the Event. This option will assign the Event to Users are assigned the course.
|
|
Self Registration Available
|
If you would like to enable users to Self Register into the Event, you can utilize this column to enable this option.
‘1’ allows a user to self register into the Event
Blank or 0 will disable Self- Registration for the event
|
|
Approval Required
|
For Events that have Self Registration enabled and you would like Managers to approve a user’s registration into the event when a user self registers, you can utilize this column.
‘1’ will set the Approval Required to Enabled. Users who Self Register into the event, will need approval from their manager to become enrolled into the Event.
Blank or 0 will disable Approval Required for the event
|
|
Self Cancellation Available
|
‘1’ will set the Self cancellation Available to be Enabled. Depending if there is a cancellation deadline, users may self-cancel from the event at any time or last day of the Self Cancellation Deadline
Blank or 0 will disable Self Cancellation for the event
|
|
Enrollment Template Name
|
If you are utilizing Enrollment Templates, the name of the Template can be added to this column.
|
|
Cancellation Template Name
|
If you are utilizing Cancellation Templates, the name of the Template can be added to this column.
|
|
Allow Manager to manage credits for this event
|
‘1’ allows a manager to manage Credits for the Event for their users.
Blank or 0 will disable manager to manage credit for the event. Credit will need to be assigned via admin, Attendance Data Import Utility, Instructor, etc.
|
Where are the Course Common Fields?
If you are utilizing Course Common Field, you may add additional columns. During the import process, you will need to map the Common Fields to the columns in the XLS file that was uploaded.
The Second part of this guide will include how to fill out the template for a certain scenario(s)
How to fill out the Course Event Import Template
Scenario 1: One course with multiple classroom events containing 1 session each.
Description: For this scenario we want to add the course “LMS Training – In House” to the LMS as well as several events each containing a different session. These Events below will be added
- March 30, 2021 9:00 AM EST to 12:00 PM EST - Titled “March 30th”
- April 5th, 2021 10:00 AM EST to 12:00 PM EST and another session on April 6th 2021, 10:00 AM EST to 12:00 PM EST - Titled “April 5-6th”
- April 20th 2021 4:00 PM EST to 8:00 PM EST - Titled “April 20th”
